Logging In
Browsing products is possible without logging in however, for pricing, availability and to place orders you will need to login to your account. To login, use your internet browser to go to http://www.kookaburra.com.au
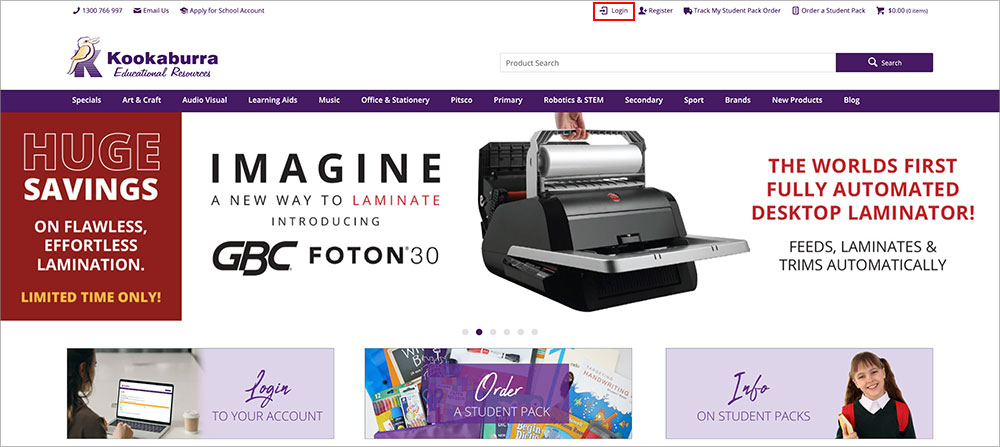
Click on the Login text in the top menu or the Login to view your account pricing button in the top right hand corner of the website to go to the Login screen.
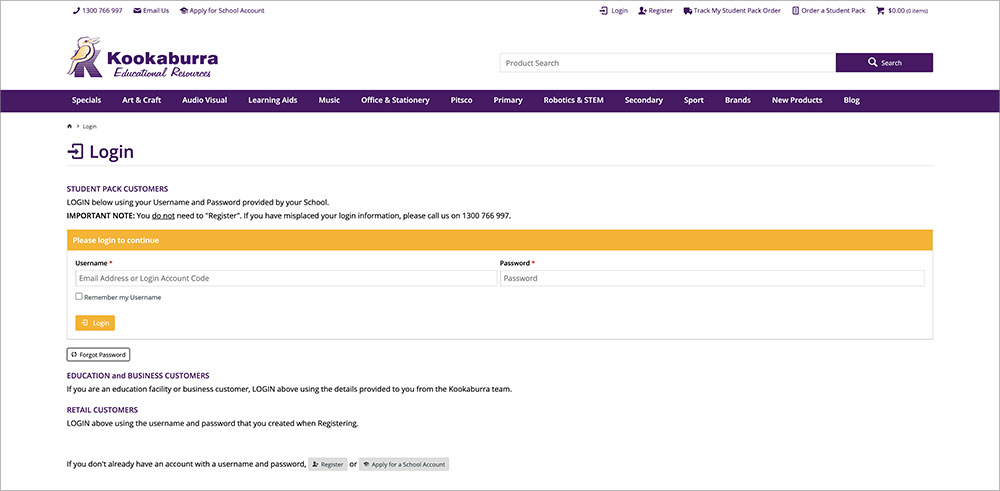
Login
Type in your Username and Password as provided by Kookaburra. Click Login.
On your first login you will need to enter your password provided to you by Kookaburra, in UPPERCASE letters.
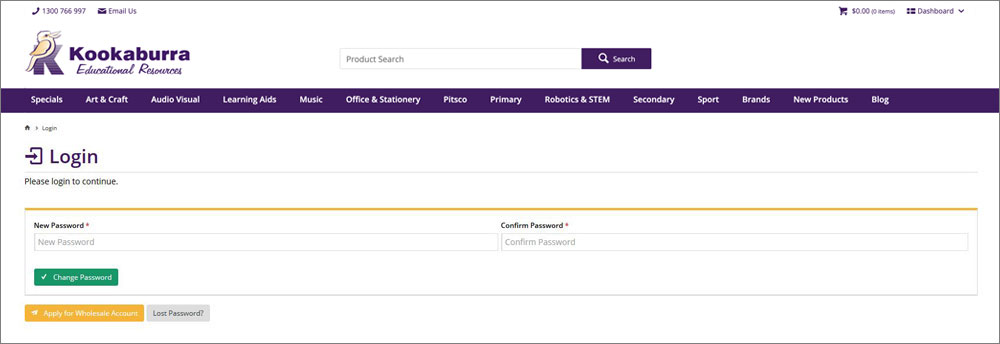
Choose a New Password
You will then be presented with the following screen asking you to change your password and provide a valid notification email address. All notifications from the site will be sent to this email address. These may include order confirmations, password reminders, authorisations etc.
Current Promotions
The Current Promotions section, which can be accessed through the website footer, allows you to view all Kookaburra's current promotions that are available. Current catalogues and flyers are only available for viewing online (please login first, then click Current Promotions in the footer).
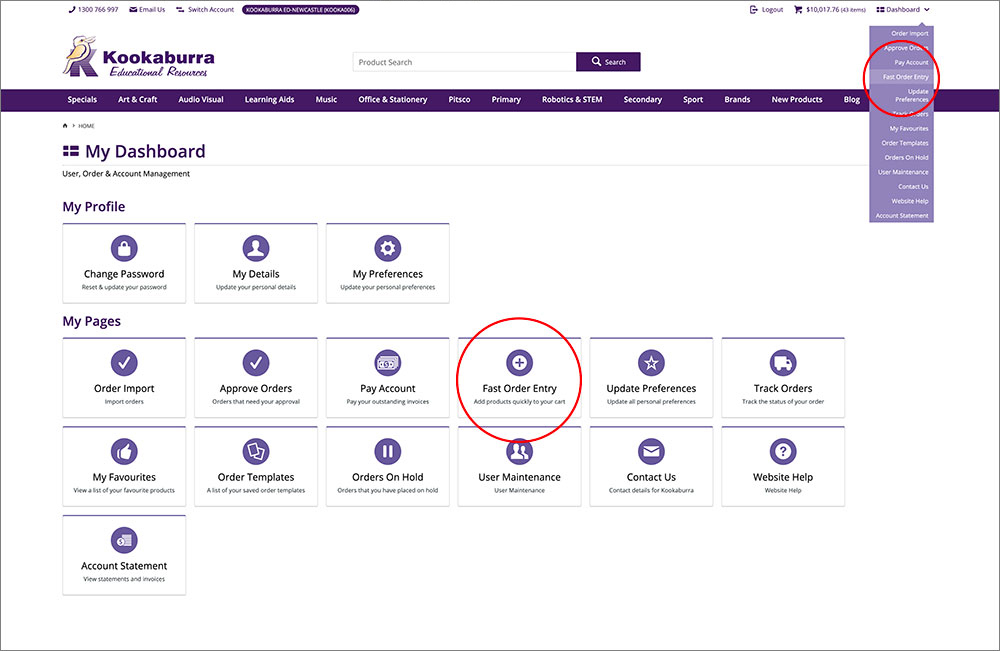
Fast Order Entry
The Fast Order Entry (used to be Quick Buy) allows you to enter products or a complete order quickly if you know the item codes for each product that you want to order.
It can be found on your Dashboard or in your Shopping Cart.
Simply type in the Code for each product and add a Qty and click Add to Cart.
Product Categories
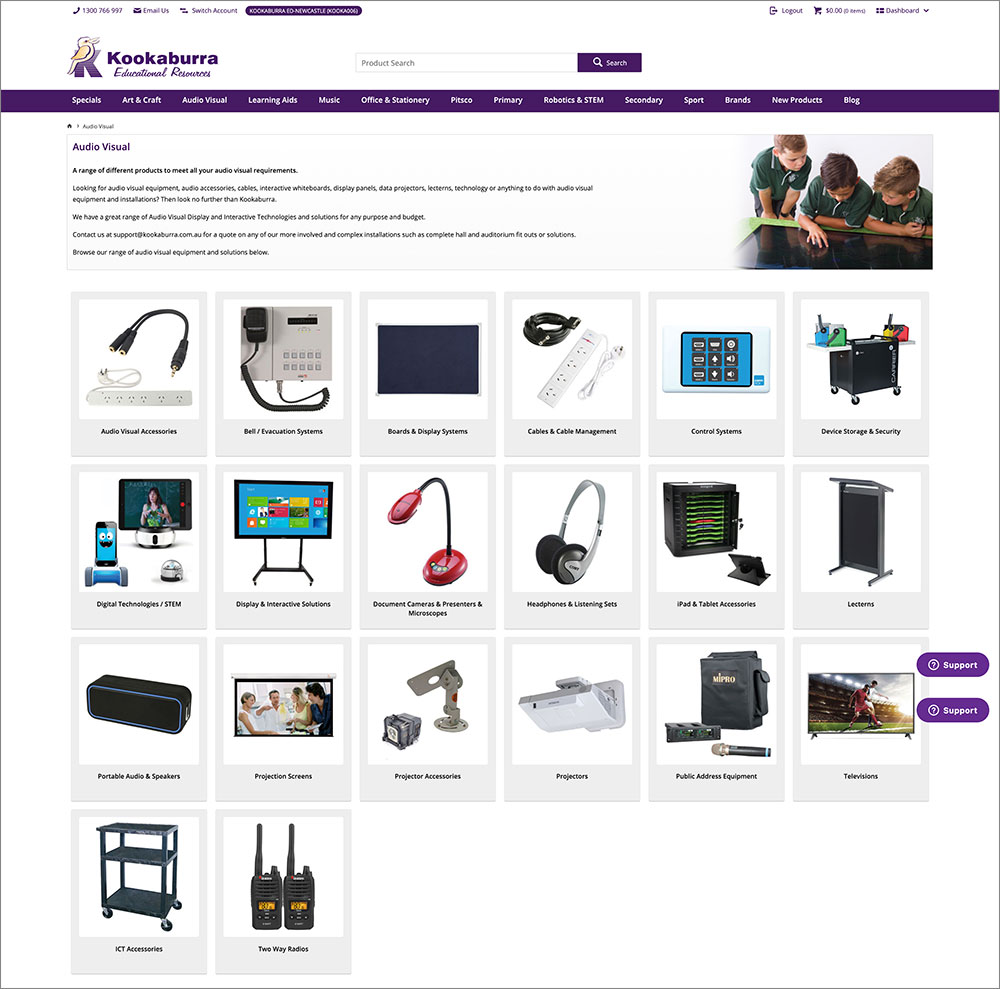
The Product Categories in the main menu shows you what types of products are available in each category.
You can drill down on any product category by clicking on the category name. At all times there is a breadcrumb trail at the top of the window displaying where you have been, and you can navigate back through the categories using this breadcrumb of links.
Browse Categories View
Once you select a product category from the top menu you will be presented with a table displaying all the groups of products within that particular category.
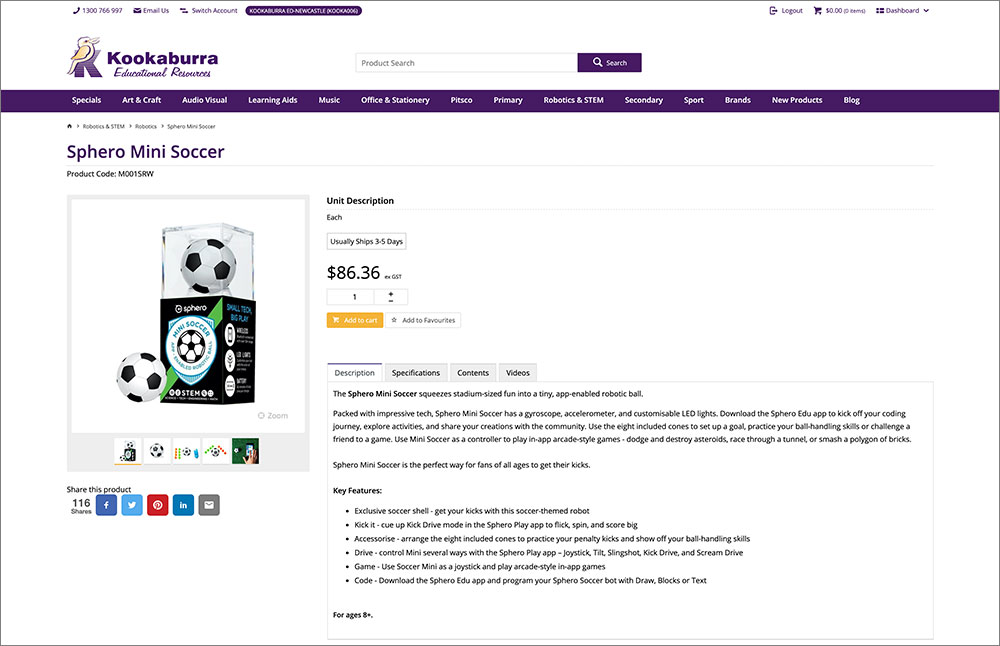
Browse Product View
If you select an individual product you can view more information about that particular product, or add the product to your favourites list.
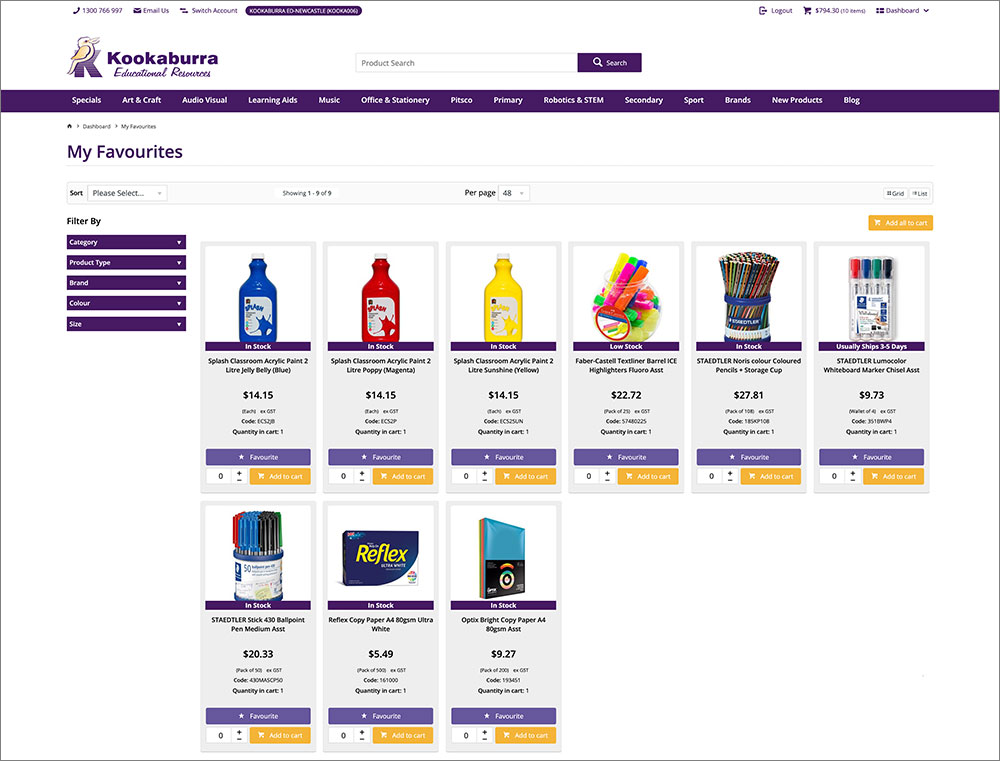
My Favourite Products
On entry into the My Favourite Products section of the site you will see a table displaying all the products currently in your favourites list. You can add products to your order directly from your favourites list.
You can add products to your favourites list by clicking Add to Favourites from within the product view.
My Favourite Products List
To add products to your Favourites List whilst in Product View select Add to Favourites. This item or other items in your Favourites List can be added directly to your order by entering the quantity then clicking Add to Cart whilst in the My Favourites Product view.

Product Search
Using the Search for a product box in the top header bar allows you to easily find the item you are looking for. You can search by product code or by entering a description, e.g. Digital Camera. A grid will display the search results. You can then view more information about an individual product by clicking on the item. You can also Add to Cart or Add to Favourites from this screen.
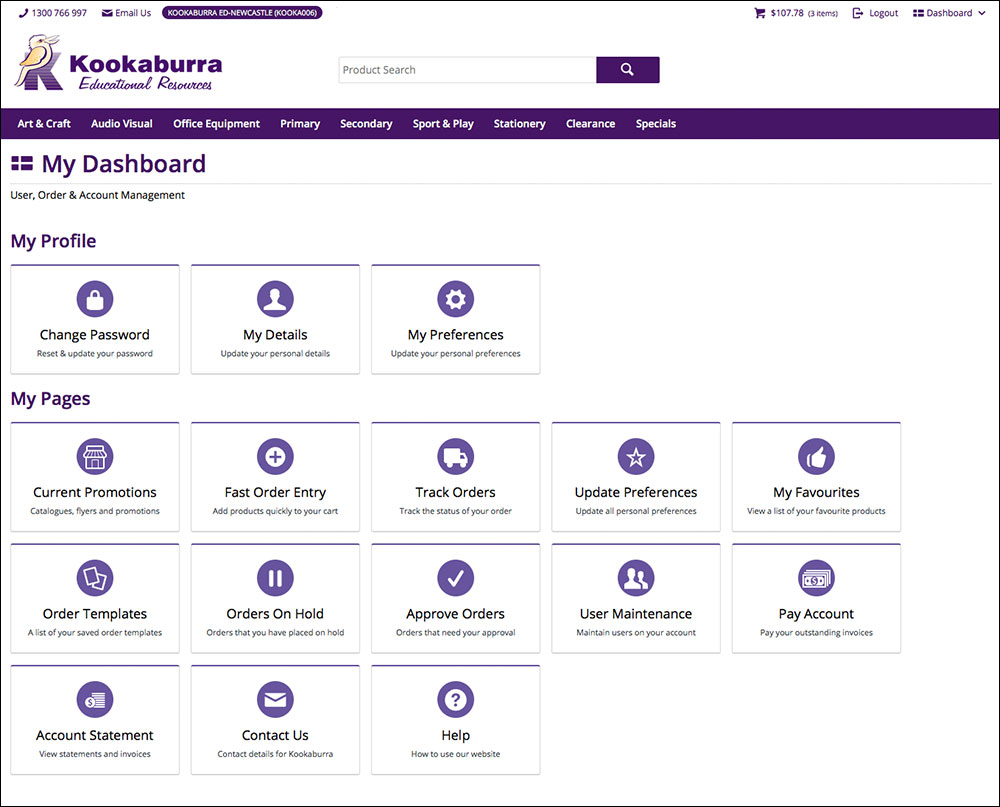
Dashboard
The Dashboard contains menu items relating to current, past and saved orders.
The dashboard includes:
- Change Password - allows you to update and change your password.
- Track My Orders - allows you to search for an order you have placed previously.
- Approve Orders - allows you to approve and order that has been entered by other users on the same account.
- My Favourites - allows yoy to access your favourites list.
- Orders on Hold - allows you to access an incomplete order that was placed on hold for later completion.
- Order Templates - allows you to maintain a list of commonly used order templates for quick access and ordering.
- Pay Account - access and view outstanding invoices for payment.
- My Preferences - update your website preference.
- Account Statement - download invoices and statements for your account.
Shopping Cart
On entry into the Cart you will see a table containing the list of items you currently have in your basket/cart.
From the Cart order table you are able to edit your current order by modifying current quantities, removing or adding items/products. You can also save order templates, put orders on hold, complete your order or request a quote from your local Kookaburra Account Manager.
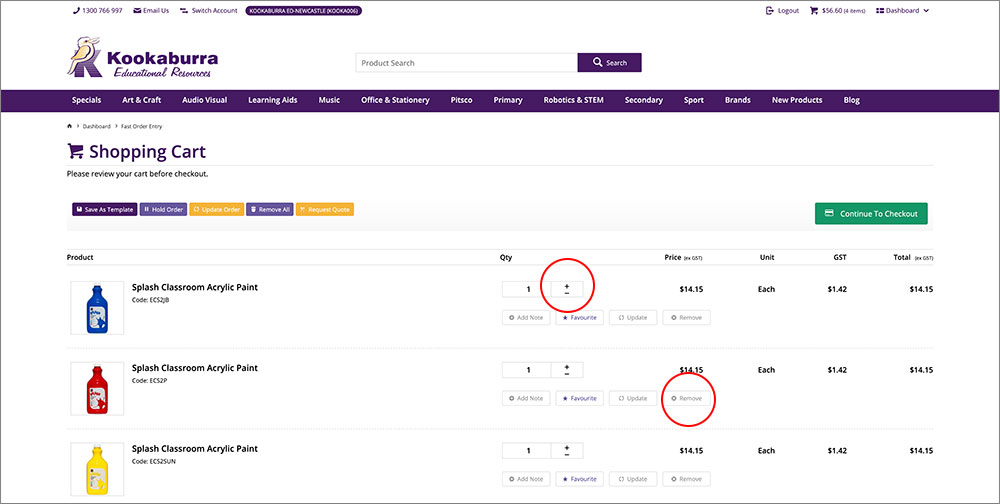
Shopping Cart Editing
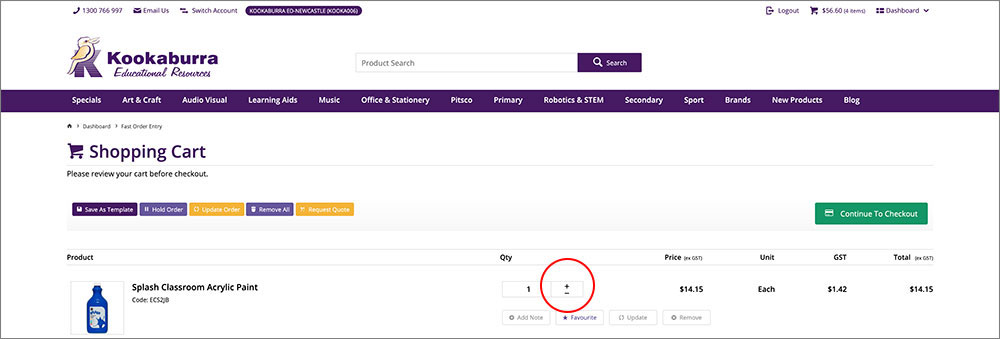
To increase the quantity or delete a product from your order simply increase the number in the Quantity box or click remove button.
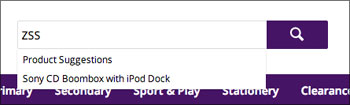
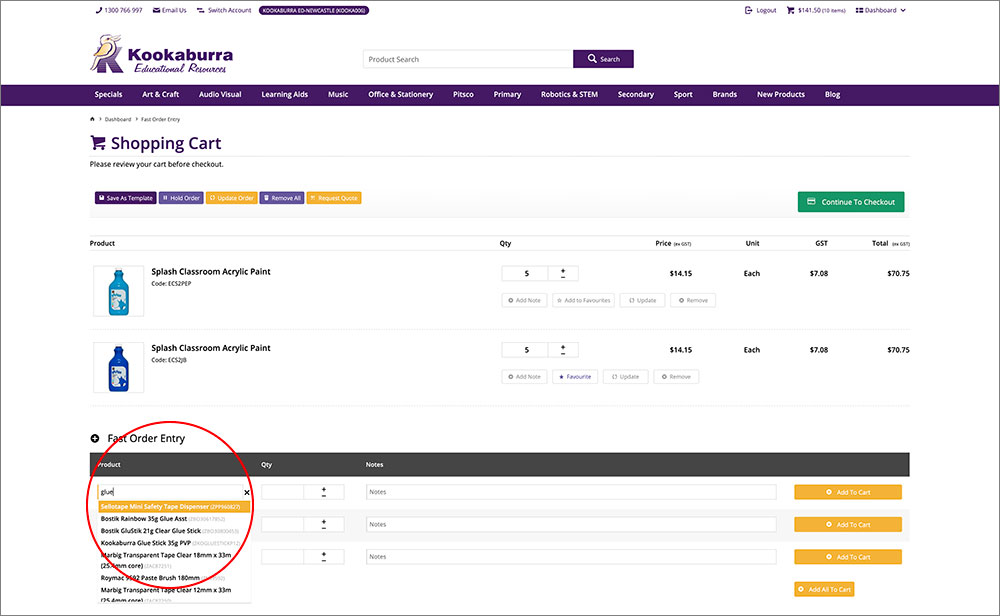
Shopping Cart Search
The middle section of the Cart under Fast Order Entry can be used as a search function. To add another item to the current order from the fast order entry section, search by product code or by entering a description, e.g. glue, in the box labelled Code and add a quantity in the box labelled Qty then click Add to Cart.
If only 1 match is found the item is added to the order as a new line item.
If the search returns more than one match a drop down list will be displayed with all the returned items.
Shopping Cart Search Results
To add the product/item to your order, select the item from the list that you wish to purchase.
Shopping Cart Add Item
Amend the quantity in the Qty box as required, and click Update Order to add the item to the current order.
Shopping Cart Complete Order
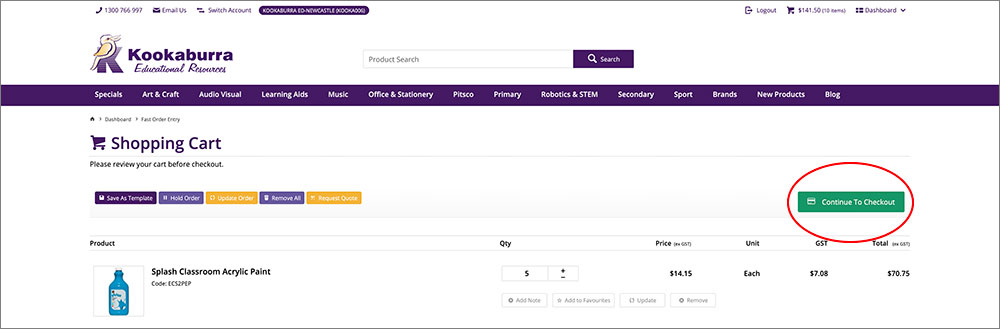
Once you are happy with the products and quantities in your current order and wish to complete it, click Continue to Checkout.
You will then proceed to the Delivery Details page.
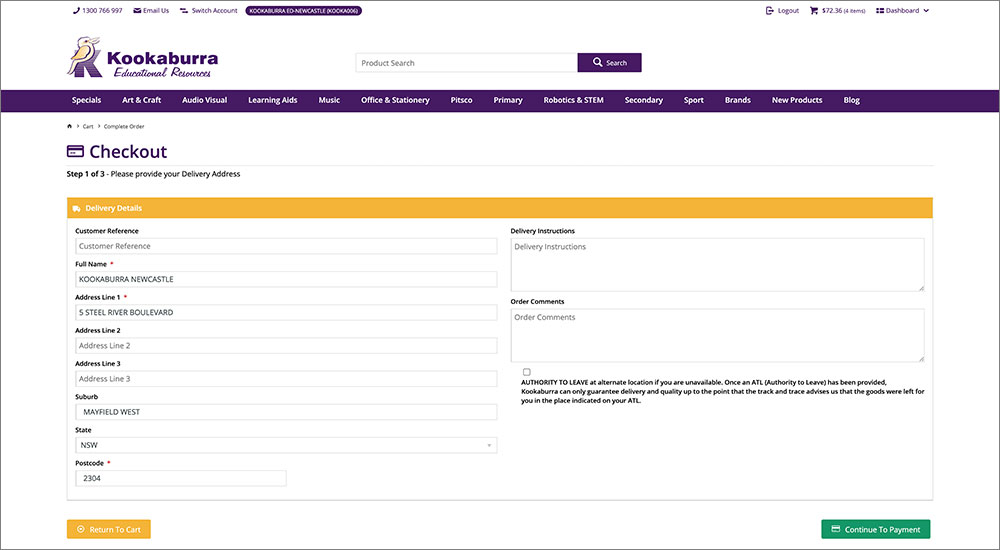
Delivery Details
On the Delivery Details page, ensure the delivery details are correct and fill in any Mandatory Information fields. After checking all information is correct click Continue to Payment at the bottom of the screen.
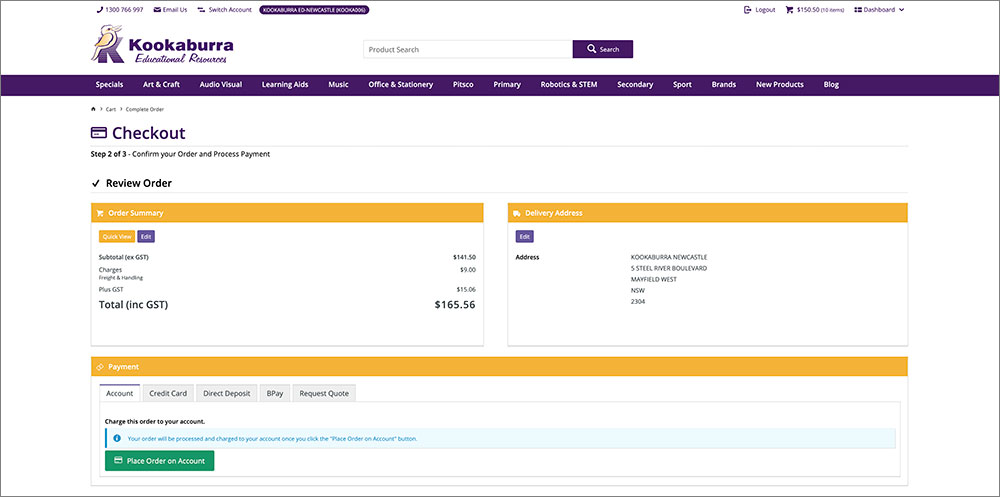
Review Order
This screen provides the details of your order, the delivery details and your payment options.
When you are satisfied with your order, Click the button on the appropriate payment method.
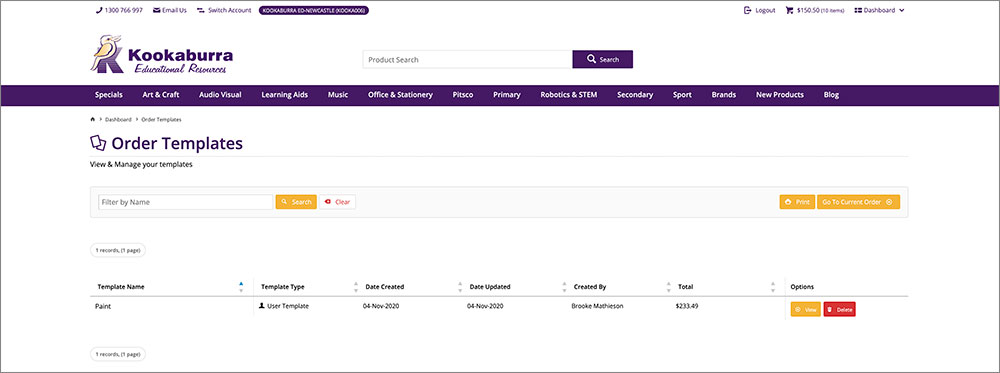
Order Templates
The Order Templates page displays a list of all your saved order templates. From here you can delete a template by clicking on the Delete button or you can view or edit the details of an order template by clicking View.
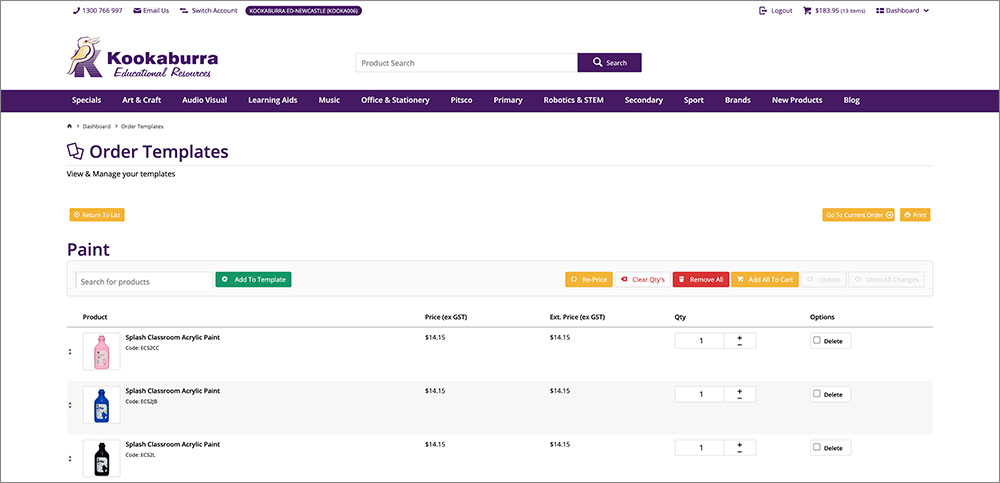
In the View section you are able to make changes by increasing or decreasing quantities and adding or removing products. After making any changes they can be saved by clicking Save Template Changes.
You can add/copy the items from the order template to your current order by clicking Copy Items To Current Order.
Order Template View
Create an Order Template
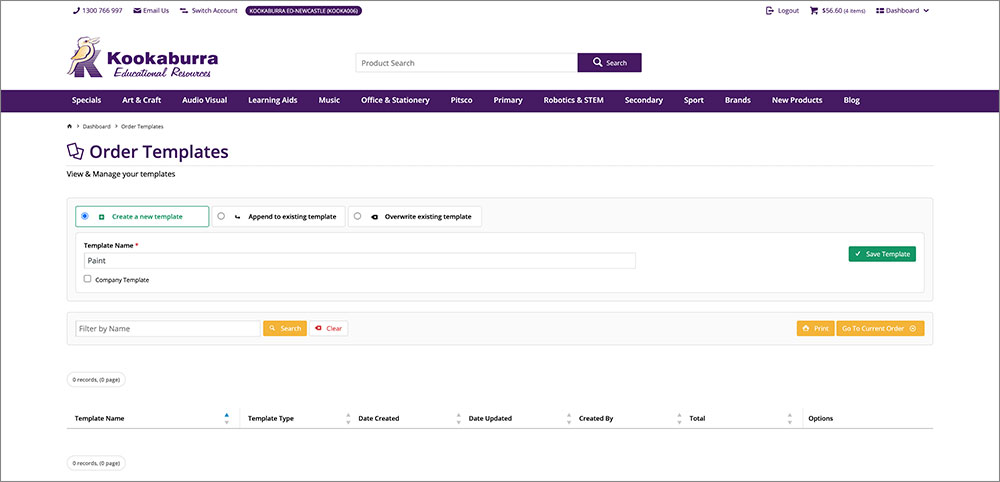
To save an order as a template for future re-use, go to the Shopping Cart, complete an order as shown above then click Save as Template.
Save Order Template
From the Save as Template page, give the template a name to identify it as a new template, e.g. Art & Craft Supplies.
If you wish to add the items to an existing template, type in the name of the existing template and click Append.
The other two options are Create and Overwrite. The Create button creates a brand new template from the items in your current order, and the Overwrite button replaces an existing order template with the items in your current order.
Use an Existing Order Template
To view or use an existing order template, go to the Dashboard > then Order Templates.
Hold Order
To place an order on hold for later completion, go to the Shopping Cart and click Hold Order.
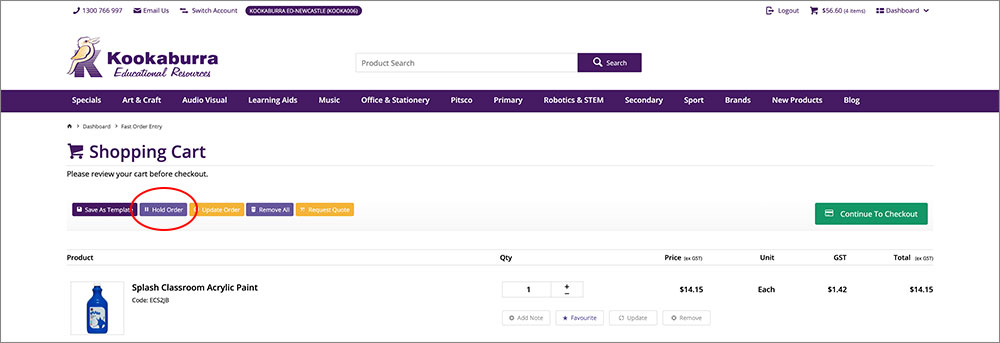
Hold Order Reference
After clicking Hold Order you will be asked to give the order a reference, this helps you identify the order from any other orders you have on hold.
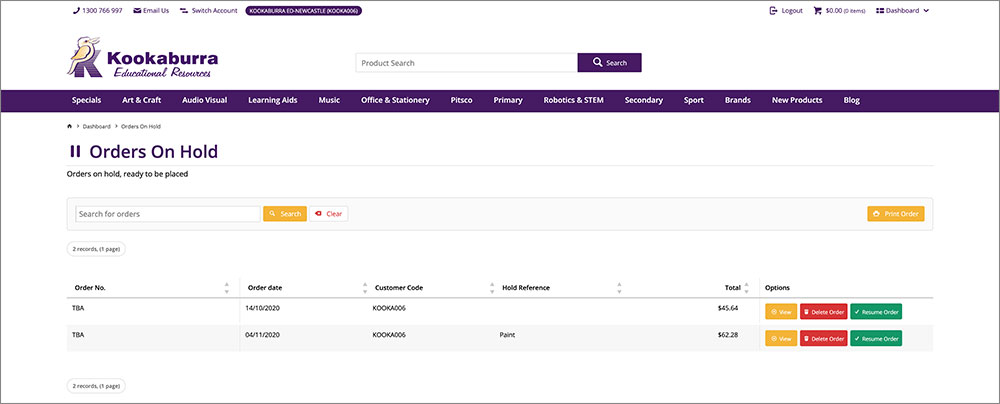
View all Orders on Hold
To view all the orders you have on hold, go to the Dashboard > Orders on Hold.
Orders Currently on Hold
The Orders on Hold page displays a list of the orders you currently have on hold. From this page you can continue with an order on hold by clicking Continue. This will copy the items from the order on hold to your current order, and will place all the items you had in your current order on hold. You can delete an order on hold simply by clicking Delete, or you can view the order details by clicking View.
View Orders on Hold
In the View section of an Order on Hold, you can see the order details, and can drill down on a product to view it in detail by clicking on the product description or product code. From this screen you can Append the items to your current order by clicking Copy To Current Order, this will copy the items to your current order, but not place the items in your current order on hold.
Track My Orders
To track previous orders, go to the Dashboard > Track Orders.
Track My Orders Selection Criteria
From the Track my Orders Selection Criteria you can choose to search by entering an Invoice/Order Number and clicking Search, or by Order Status and Date then clicking Search.
Track My Orders Search Results
The results from the search will be displayed at the bottom of the page where you can view an order by clicking View.
Track My Orders View
By selecting View for the relevant order, you can then view more information on individual products by clicking on the product description or product code. From this screen you can add the items to your current order by clicking Copy to Current Order which will copy the items to your current order.
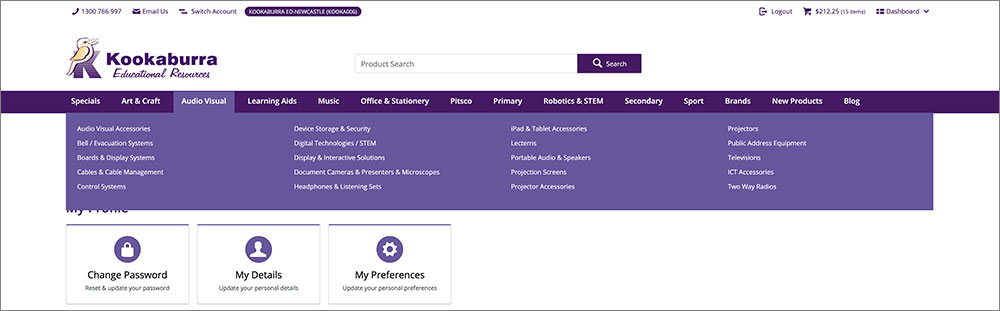
My Preferences
To update your user preferences for the Kookaburra website, go to the Dashboard > My Preferences.
Some of the preferences that can be changed are:
- Your notification email address - allows you to change where your notifications will be sent.
- Your order entry lines - allows you to change the number of blank lines on your current order.
- Default records per page - allows you to customise how many items are displayed per page in the product and search tables.
- Next order prefix - allows you to prefix your next order reference.
- Next purchase order number - allows you to prefix your next purchase order.
Change Password
To update your password for the Kookaburra website, go to the Dashboard > Change Password.
To change your password, enter your new password into the Password box and then again in the Confirm Password box then click Update.
User Maintenance
From this menu option you can create new user logins to the accounts you have access to. (This option is only available to account administrators).
Access to User Maintenance is through the Dashboard.
On entry to the User Admin section, you will be presented with all linked users:
Create a New User
To create a new user click on New.
Then fill in the list of fields:
- Username - the ID the user will use to Login to the Kookaburra website.
- First Name - the user's first name.
- Surname - the user's last name.
- Password - the password the user will use to Login to the Kookaburra website. This field is not mandatory, however leaving it blank will mean that the user has no password for the site.
- Confirm Password - copy of the password to ensure correct spelling.
- Initial Role After Login - this is the role the user will take after logging into the site.
- Two roles are available:
-
- PUBLIC - this role is typically for anyone that browses the website and has not yet logged in.
- CSSUser - this role allows users to place orders using the customer self service software online.
- Order Limit - the $ limit the user is allowed to order without getting approval. Leaving this limit at $0.00 ensures that all orders placed by all users will need to be approved.
- Orders Approved By (Username) - this is the Username of the user who will approve the orders for the new user.
- Contact Phone Number - the contact phone number for the user.
- Current Order Page - Order Entry Lines - the number of blank order entry lines on the Shopping Basket page.
- Display Header Graphics - whether or not the user can see the header graphics.
- Display Help Messages - whether or not the user can see help messages.
- Display Availability in Order Entry Screen - whether or not the user can see the product availability in the Shopping Basket.
- Disable Favourites Maintenance - whether or not the user can add or remove items from their favourites list.
- Optimize for PDA Device - used if the site is going to be used on a PDA.
- Default Records per Page - the number of records displayed per page.
Delete a User
To delete a user, firstly select the user from the list of linked users, then click Delete.
On the confirmation pop up, click OK to continue with the delete, or click Cancel to abort the delete.
Modify a User
To modify a user, firstly select the user from the list of linked users, then click Modify.
A table will be displayed, which is the same as creating a new user. Proceed to change the fields you need to modify, then click OK.
Accounts
You can access details for your Accounts from the Dashboard.
Account Statement - allows you to download invoices and statements.
From the drop down list, select an enquiry option, e.g. Statement for January, then click Display.
Pay Your Account - allows you to pay your account.
By navigating to the Pay Your Account section, you can pay outstanding invoices using electronic funds transfer or secure credit card payments.
Tick the check box next to the invoices you wish to pay, then click the Calc button to see the total amount you are paying. Once all invoices are checked click the Continue to Payment button to proceed to the next step.
Payment Method
On the Payment Summary screen, you will see the total amount you are paying. You are then required to select a payment method from the drop down list. Select the method to proceed to the next step.
Credit Card Payment
After selecting the Credit Card Payment method, you will need to click the Pay Now button to proceed with the payment.
Select the type of credit card, fill in the card details and once completed click the Process Payment button to complete the payment.Credit Card Details
Electronic Funds Transfer
After selecting the Electronic Funds Transfer as your payment method, enter the receipt number (this receipt number is not mandatory) given to you from the bank after you have transferred the money, then click the Confirm Payment button.